Our story so far: We were seeing the pay off of months of hard work in the renovation of an old Methodist church into our home.
# # #
Time will tell.
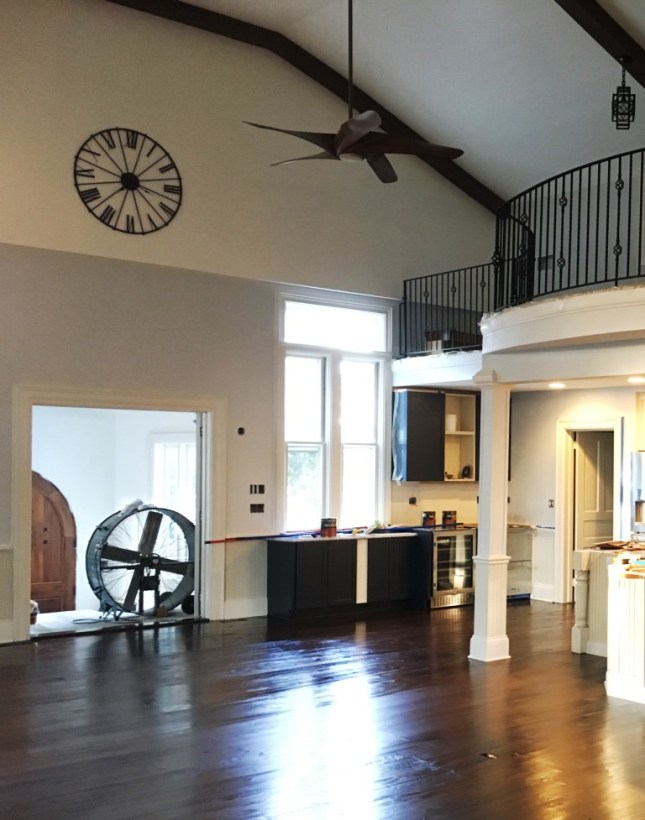
Another small detail that caught the eye of a lot of people who looked at images of our floors was the clock we put up above the interior entryway doors.
I coveted a clock like this even before we purchased the church. If you watch “Fixer Upper” even a couple of times, you’re bound to see a clock—usually with hard-to-decipher Roman numerals because it doesn’t even matter if you’re using it to tell time—in the After reveal; “oversized clock” was listed in our design style. When I found an airy, wrought-iron clock in the showroom of our glass guy, I purchased it on the spot.
Originally, I had planned to put it up on the fireplace, but we decided we had enough going on up there. We enlisted You-Can-Call-Me-Al, who could be depended on for straight-and-level installation, to put it up inside the interior entryway doors. Many more items would be hung on the walls in future weeks, but this one went up while we still had tall ladders at the ready.
Our story so far: My husband celebrated his birthday with a litany of complaints about the enormity of the church conversion project we had taken on.
# # #
Tyler’s birthday wasn’t the only occasion that week overshadowed by work at the church. A few days after Tyler aged another year, we celebrated a milestone wedding anniversary: Ten years.
Since we were buying things for the church like Home Depot shopping addicts, we agreed we didn’t need to exchange gifts for our anniversary, but I requested earlier in the month that we mark the occasion by going out to eat. Tyler obliged by making dinner reservations.
When our anniversary arrived, I realized I would be spending the entire day on my hands and knees. Hand-washing every square foot of wood floors in the church so Tyler could apply the last two coats of polyurethane before we left for the weekend.
If I didn’t do this, all the dust and tiny paint splatters on the floors would be forever encased in a layer of shellac, reminding me of my sloth and sloppiness.
I donned a pair of kneepads and began on the second floor. It was about 10 o’clock, and at this point, I was sure we would not achieve our goal because the floor of the sanctuary was still covered in ram board, miscellaneous cabinets and tools. But while I washed the pine upstairs, Tyler and his hired man St. Johnny cleared and vacuumed the sanctuary so by 1:30 when I finished the upstairs and the main floor master suite, I moved to the enormous empty open-floor-plan great room.
I earned a repetitive-stress strain in my shoulder by performing the same sweeping wiping motion with a wet rag a thousand times. Hand mopping sawdusty floors required me to refill my wash bucket several times for each room. Remember, at that point, the only running water in the church was in the basement. So I made many trips up and down two flights of stairs. I also scraped off paint splatters where I found them, so I carried sharp implements in my pockets (which, not infrequently, poked me, too). Fortunately, our painter prepped well, so there were few drops of paint to remove.
I finished washing at 4 o’clock, just in time for a much-needed shower before dinner, while Tyler wrapped up the first coat of polyurethane (to be specific, it was the third coat in total, but it was the first of the final two coats—if you’re counting down, which believe me, we were).
We dined on steak and pasta, which we most definitely earned.
The granite counter top on the island hadn’t been installed yet.
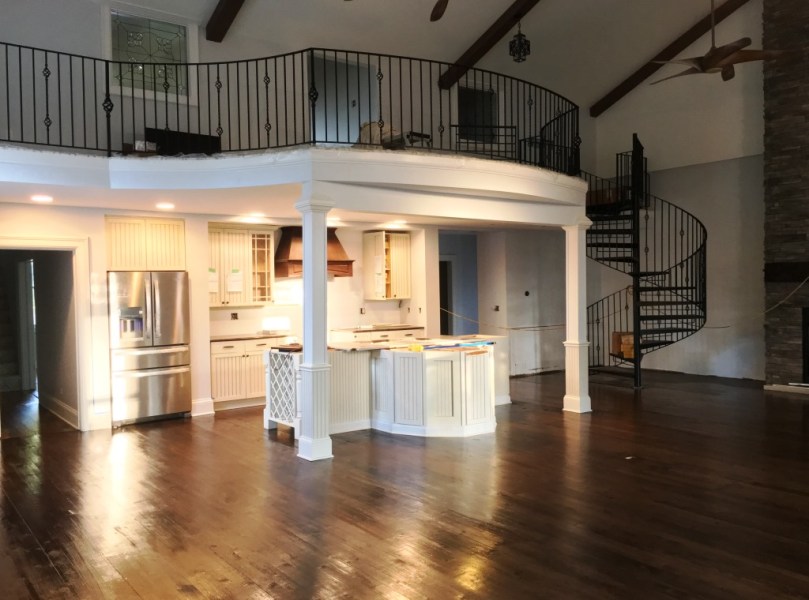
The next morning, we surveyed the results before Tyler applied the final coat of polyurethane and we decamped elsewhere and left it all to dry. The way everything looked was the best anniversary gift ever. In the morning sun with the lights on, the kitchen literally glowed. The sawdust and tools were gone, and the floors gleamed.
I tiptoed around in my bare feet, taking pictures like a pro with both our phones so we could share the results with every last person we might encounter over the long weekend. We were so proud of ourselves. The pain and effort were worth it.
# # #
Tomorrow: What time is it? No more guessing. Read about about it here.
Our story so far: We neared the finish line in at least a few spaces of the old Methodist church we were turning into our home.
# # #
Among the finishing details I enjoyed watching come to fruition was the door to our granddaughter’s playhouse, the space under the eaves we’d named for her.
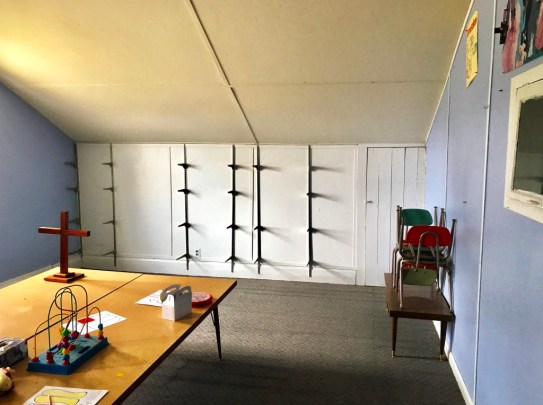
Here’s a shot of the second floor when we purchased the church. See that door on the right? It led to a storage space under the eaves. The “Do Not Open” sign we ignored is on the table there.
More than once, I was amused to see a grown man working in that little five-foot-high space. The drywallers installed drywall, and the painter painted it. I sanded the floors with the edging machine (it was less amusing when I was the one on my knees).
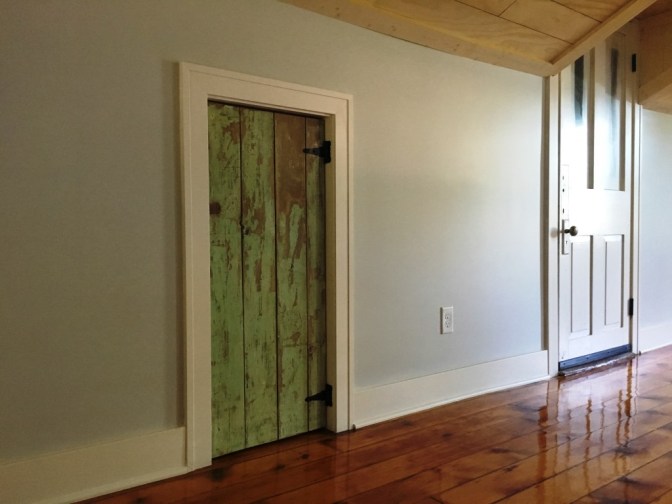
Tyler recycled the old closet door that had led to the opposite eaves. When we’d first toured the church, a hand-lettered sign was posted on the closet door warning: “Do not open!” Behind it was a lot of dust and debris.
He removed several layers of paint until he revealed the last layer—a distressed sea foam green that I loved. He cut it to size, and I applied a couple of coats of clear polyurethane. He attached it to our granddaughter’s playhouse with some vintage-y black hinges; all we required now was a cool door knob. Our soon-to-be-walking granddaughter would find this little room to be just her size.
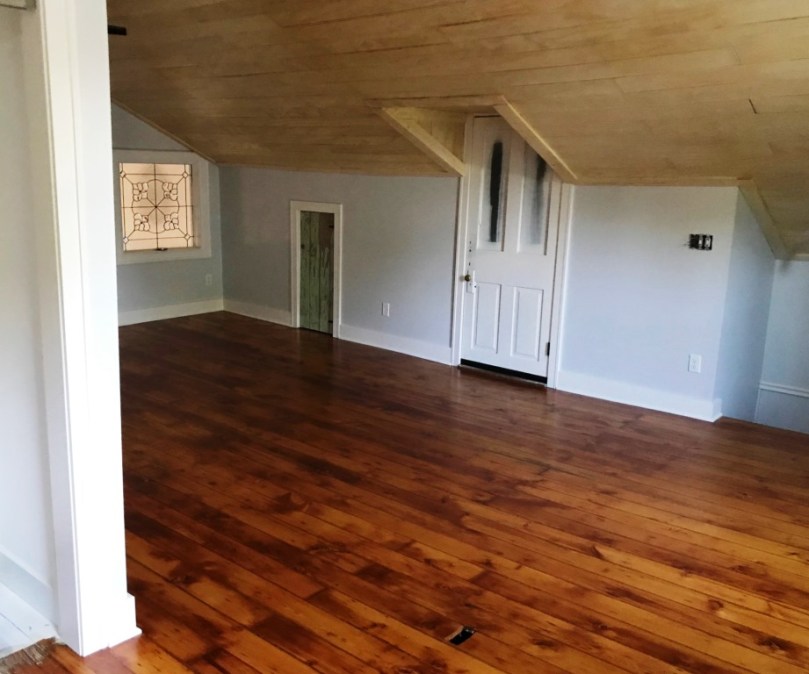
Here are the eaves on the other side of the room (the belfry side), where the little door on the left now leads to our granddaughter’s playhouse. (And how about those floors?)Here’s a close-up of the door.
# # #
Tomorrow: More floors. This one you don’t want to miss. Click here.
Our story so far: Cabinets throughout the old Methodist church were installed, and the place was beginning to look like a home.
# # #
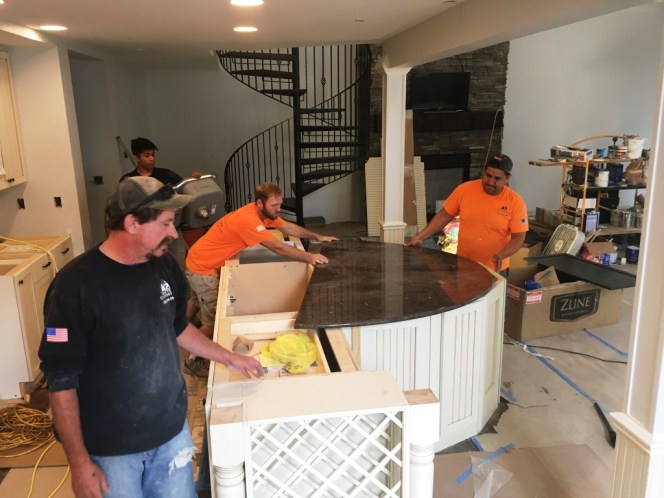
Like the installation of our balcony railing, the installation of our counter tops was quick and satisfying. A week after the experts came to measure, they returned with finished stone and manhandled it into place. Because of the complexity of our kitchen island, they dry-fitted the granite during that second visit and returned a few days later to glue the finished pieces into place.
Hub of activity.
There was only one hiccup. Part of the beverage bar did not fit the first time. It had to be removed and refinished. Moving massive pieces of quartz and granite is not for the faint-hearted. At least four men were involved with every piece. I was reminded yet again about how heavy construction materials were, and grateful for the named and nameless men who helped us move items into the church.
When they completed their work, I would tour the church in the evenings, when everyone else was gone and quiet had descended on the place. I would pass my fingers along the cool, smooth stone of the countertops and, depending what room I was in, I’d imagine what it would be like to brush my teeth or chop vegetables or make a cup of coffee. We were nearing the point at which we’d have an operational bathroom, bedroom and kitchen which meant we could move into the church. All we needed now was a few tweaks by the electrician and by Glimfeather, our plumber (Glimfeather was on toilet duty, too). We were on to Phase Five: Finishing.
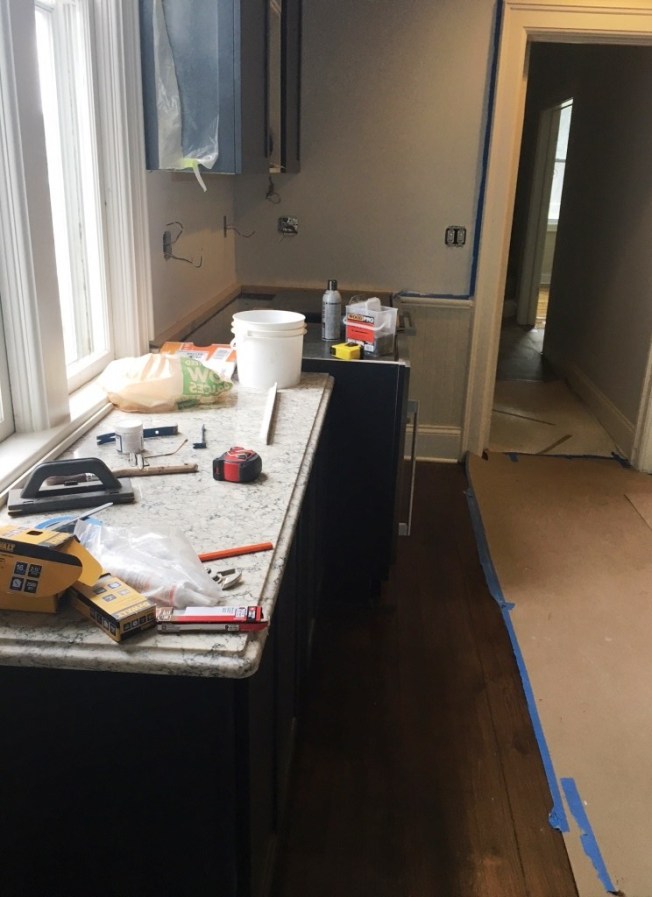
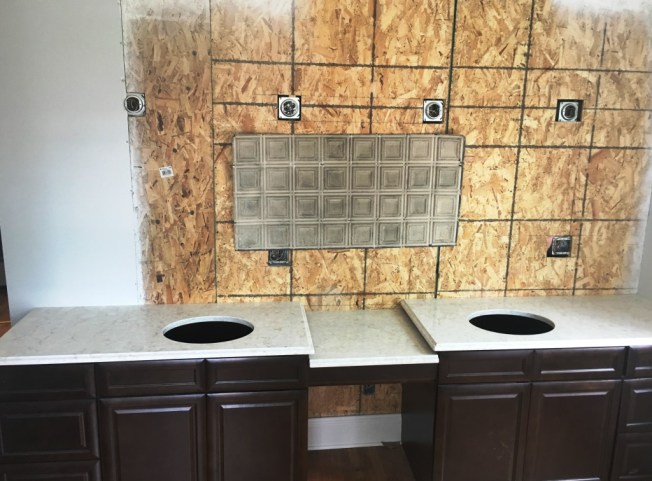
Well, if you wanted glorious After shots of the installed granite, you’re going to have to wait (which is fair, since I have to wait, too). But these pictures give you an idea.Clearly, we’re still in a work zone. This is part of the beverage bar counter top.Master vanity counter top.Upstairs vanity. Those rectangle pieces of packaging paper? Mirrors, silly.
# # #
Tomorrow: Chapter 38 begins, telling of finishing details. Read it here.
Our story so far: We installed the kitchen and bathroom cabinets in the old Methodist church we were turning into a residence.
# # #
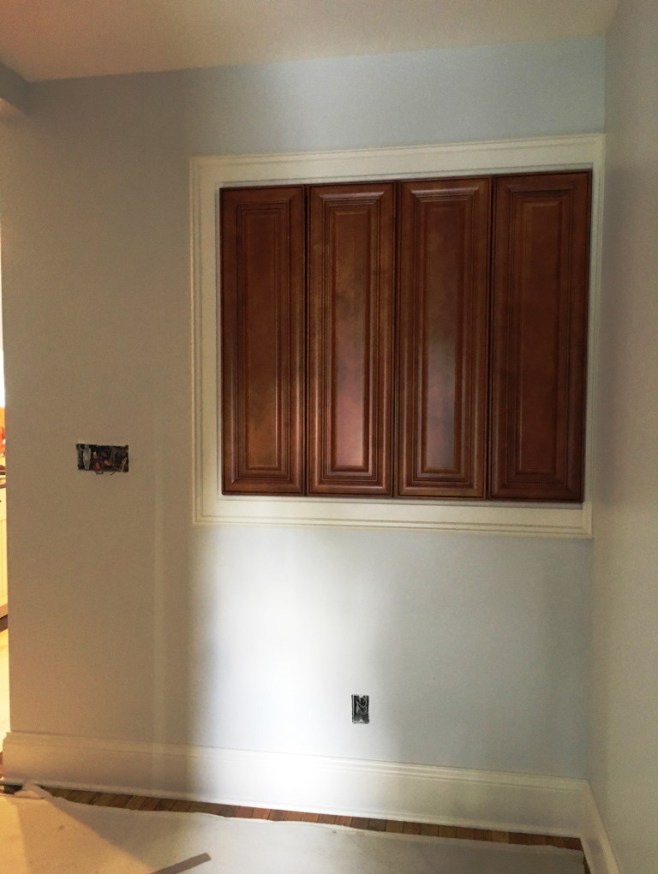
This was the view from the mudroom into the master closet, with the laundry at the other end.
Throughout construction—especially after drywall—people asking about the window in our closet amused me.
No, we did not design a window into the closet.
But the hole at the end of the closet looked like a window for a while.
Instead, it was a slot for a bank of cabinets in the mudroom. They were designed at a height that would allow us to place a pew beneath them. Yes, a church pew! Tyler had owned this pew for decades; at one time he was responsible for shortening it and refinishing it. It sat just inside the front door of our previous home so people could sit to remove or put on their shoes. It would serve the same purpose in the new mudroom, which led from the garage.
One of our design rules was to build storage into every room, and the mudroom was no exception. A quick look at design magazines and blogs will tell you every homeowner’s headache is the “drop zone” in the entryway forever filled with clutter. A single little pew wasn’t going to cut it. But a bank of cabinets to store keys and purses, shopping lists and shopping bags, flashlights and lightbulbs might do the trick.
Tyler assembled the cabinets, and You-Can-Call-Me-Al installed them and trimmed them out. Suddenly the empty maw into the master closet smiled like an old man with new teeth. No one would be asking about the window in our closet anymore.
Our story so far: We installed cabinets like mad when we could finally tackle this phase in the conversion project of the 126-year-old Methodist church.
# # #
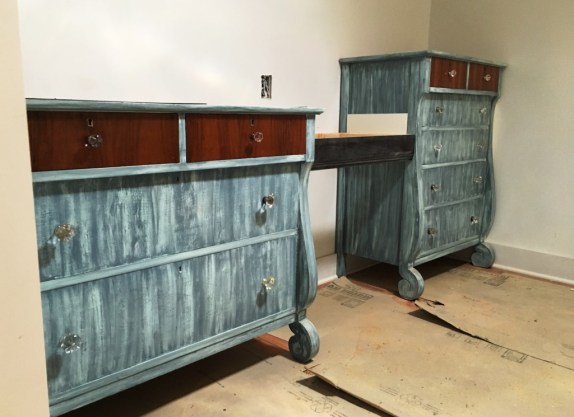
Meanwhile, I had been working on the dressers that would become the vanity for the upstairs bathroom. After I painted them, most of the drawers wouldn’t close anymore, so I spent one morning sanding edges. I also dragged my lot of eBay crystal knobs to the hardware store to find appropriately sized screws.
You-Can-Call-Me-Al installed the dressers in the bathroom, created fillers and built a ledge for the makeup table in the center. More work would be necessary; Tyler would have to modify the drawers for the sink, I would have to paint all the added bits and pieces, and we needed mirrors, but like the kitchen, this vanity was ready to be measured for counter tops.
Crystal knobs: Good call, readers.
# # #
Tuesday: Cabinets for the mudroom. Wait, there’s cabinets in the mudroom? Check them out here.
Our story so far: The main refrigerator was installed with just an inch to spare in the old Methodist church we were turning into our home.
# # #
Past experience taught us that one refrigerator wasn’t enough. In our previous home, we made liberal use of a used refrigerator in the garage, especially when we entertained. So this time around, we designed room for not one but two additional refrigerators—one for beer and pop and one for wine. Once we added our Drinkpod water cooler and a coffee maker, surely we would have enough space for beverages for everyone. Including a beverage bar in the kitchen design was one of my favorite design ideas.
As was his wont, Tyler ordered both refrigerators online, and they arrived packed in multiple layers of plastic and cardboard. The beer cooler was dented (slightly), and the wine cooler’s door was awry.
A little bit of complaining yielded discounts on both. Tyler fixed the wine cooler door with 57 cents in new screws. We were happy with this result. It meant every appliance in our new kitchen was purchased used, at a discount or on sale. Given the extras required for the Craig’s List stove hood, this was good for the Tequila budget (with plenty of space to ice tequila in the future!).
Can I offer you a drink?
Both refrigerators were installed with only a little bit of finagling.
We were finally ready for counter tops. Tyler called the counter top company to come and measure.
# # #
Tomorrow: Cabinets for the upstairs bathroom. Check them out here.
Our story so far: As we installed cabinetry and appliances in the kitchen of the old Methodist church we were converting into our home, a bit of creativity and old-fashioned ingenuity were required.
# # #
And then there was the refrigerator.
There had been no refrigerator in the display kitchen. I guess display people don’t need cold food. But we were real people, and ice cream was a requirement, not a negotiable.
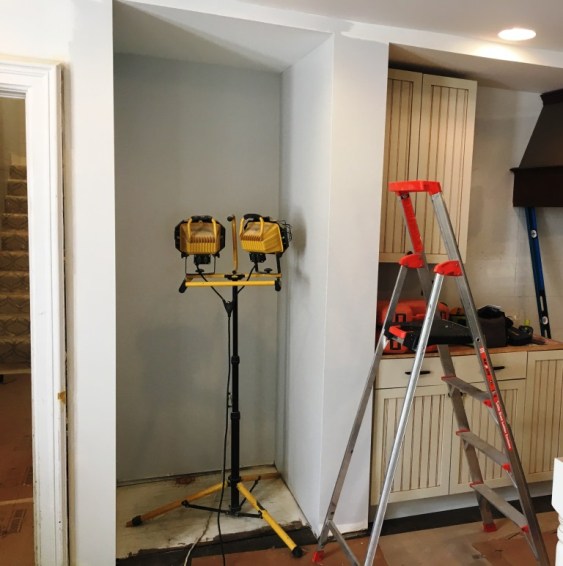
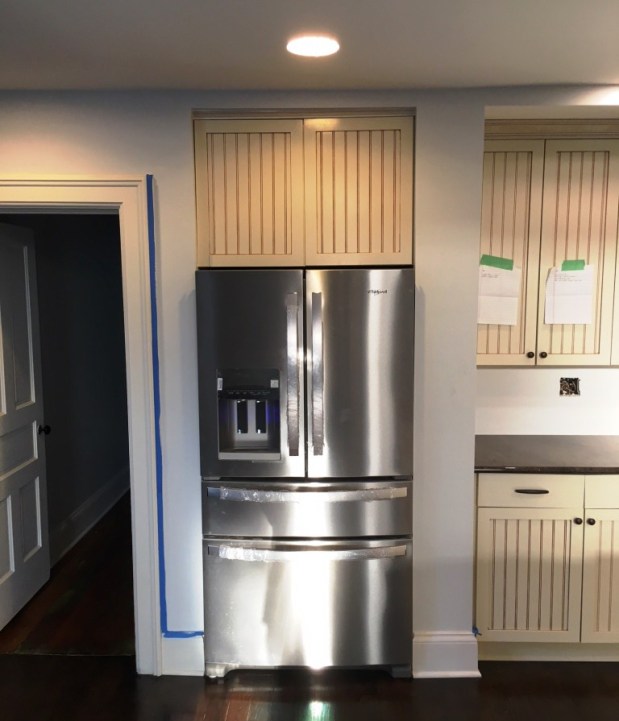
When we designed our kitchen in the chome, there was a perfect 37-inch-wide nook on the left side of the back wall of the kitchen; the congregation had a custom cabinet in the space which we imagined might have stored bread and wine. This slot was maintained when Tyler installed the header to support the balcony. The drywallers drywalled the space, and we were set to shop. Only with five-eighths-inch drywall, our slot ended up 35-and-three-quarters-inch wide. A 36-inch refrigerator would not fit.
That’s OK, refrigerators come in a variety of widths. We knew we’d find one. And while we were shopping for the washer and dryer, we did find one. It was 35-and-five-eighths-inches wide. We liked it because it had more capacity than some 36-inch-wide ones (so much more than a skinny 32-inch-wide or 34-inch-wide refrigerator). It would be snug fit perhaps, but hey, we had an eighth inch to spare. We signed the dotted line and committed to a delivery date.
I suppose you know where this story is headed.
We will never speak of this wall that is crooked by an eighth inch again.
Back at the church we measured the twice we should have measured the first time.
We did indeed have 35-and-three-quarters inches at the top of the opening. But we had only 35-and-a-half inches at the bottom.
At one point, Tyler, who has used brute force in the past on obstinate inanimate objects, said he’d shove it in one way or another. I’m sure he could have.
But he reconsidered.
And he called the drywallers.
Who came by a few days later to replace the five-eighths-inch drywall with quarter-inch drywall, thereby buying us a whole inch of play, top and bottom.
Our painter Low Talker painted the slot just in time for delivery of our refrigerator.
No brute force required.
If it looks like the slot was designed for this refrigerator, it was!
# # #
Tomorrow: More appliances. More issues. Read about it here.
Our story so far: We had finally progressed to the cabinets phase of renovation in the old Methodist church project.
# # #
What a hood! What a deal!
We had purchased the stove hood as part of the castle door deal. The door seller had a strange variety of stuff in his garage, including the enormous wood stove hood. Tyler got him to throw it into the deal. This was long before we found the display kitchen and long before we purchased the 36-inch wide stove on Craig’s List, so we tiptoed around it in the basement for months.
It seemed like an incredible deal to me.
Until I saw the tab for the vent. The hood was just decoration. To make it operational, we needed a vent. In the correct size. Tyler found a new one he liked. Cha-ching.
No matter how good your vent, you need ducting to transfer the smoke (or whatever it coming off your cook top) to the outdoors. During the mechanicals phase, Tyler thought ahead enough to get ducting from the hood to the outdoors. Cha-ching.
The vent needed to be inside the hood, and that required You-Can-Call-Me-Al’s expertise. Cha-ching.
And to make a vent operate, we needed electricity.
So we put the electrician to work on the project. Cha-ching.
Of course, it wasn’t a simple connection. It didn’t work on the first try, so we would need to remove the vent, problem solve, and try again.
Cha-ching.
The incredible deal was actually a money pit. Or money vent, I guess. Poof, money floating out of the chome through the stove vent ducting.
# # #
Tomorrow: Hmm, the stove hood isn’t the only challenging appliance in the kitchen. Read about the other one here.
Our story so far: The display kitchen cabinets we found on Craig’s List for an incredible price to install in the church we were converting were a Rubik’s Cube without instructions.
# # #
That’s the problem with doing it the way we did. We had a lot of jerry-rigging to do.
When a regular homeowner purchases a custom kitchen, someone comes to measure everything, draws up plans with illustrations and sends instructions to the installer. We measured, more than once, but our installation prep ended there. Which left of a lot of loose ends:
We switched cabinets on either side of the sink so the wine rack would face the beverage bar.
We ended up with a leftover drawer. You-Can-Call-Me-Al noted it would fit perfectly on the floor beneath the wine rack. It would be perfect for wine corks.
We eliminated the shelves and drawers and moved the glass-fronted cabinets to either side of the stove. The cream-colored shelves were moved to the blue beverage bar, so they required painting.
We shortened the tongue of the island and added cupboard doors so we could use the storage space. When cabinet doors in the wrong color arrived, our painter Low Talker spray painted them, and I glazed them. Ditto for the cupboard above the refrigerator.
I painted yards of kick plate and quarter round to match both the cream-colored cabinets and the blue ones.
We planned for a wider stove than in the display kitchen making the stove vent obsolete. Fortunately, we acquired a different one. But it was brown. We couldn’t decide if we wanted to leave it or paint it.
Oh, the stove vent. What a deal.
The kitchen cabinets, topless, but in place.
# # #
Today’s headline is a quote from 20th century novelist Zelda Fitzgerald and wife of author F. Scott Fitzgerald.
Tomorrow: Penny wise and pound foolish. Read about our folly here.