Our story so far: As the electrician wired the old church we were turning into our home, we selected light fixtures.
# # #
The existing exterior light fixtures were hardly worth mentioning.
The first light fixtures a guest would see upon visiting our new home would be the exterior lights. The existing lights were functional but sadly plain. And too small for my taste. The new lights would frame the castle doors, so we chose contemporary castle mash-up stylistically, and Tyler found a matching set on eBay.
The fixture included seeded glass, which roughed up the design just enough to qualify as rustic. We would employ this strategy on other light fixtures inside the house, too.
In another delivery snafu, one of the light boxes arrived with a distinctive rattle. The round glass—impossible to replace—was a pile of shards in the bottom of the box. Fortunately, the seller offered a quick refund and Tyler bought another immediately. Like our other finds, the lights went to the ever more crowded storage unit.
Castle meet contemporary.
# # #
Tomorrow: Lighting for the entryway. Read it here.
Our story so far: Reroofer, who once helped us repair the belfry, was enlisted to blow insulation into the roof of the 126-year-old Methodist church we were turning into our home.
# # #
But Reroofer, our agile roof walker, wasn’t finished yet. With an uncharacteristic daytime handoff from Glimfeather the plumber, Reroofer threaded the soil vent pipe through the roof and proceeded to repair the hole in the roof created when we removed the portable gas heater (and accompanying stove-pipe) from the second floor.
Reroofer, happy to be outside on the roof instead of inside spraying insulation.
A soil vent pipe, for people who only use bathrooms but don’t know how they work, has nothing to do with soil. It runs vertically from the underground drainage system to the roof. The vent allows odors from waste to be released into the atmosphere. By placing it above roof gutter level, no one’s the wiser about the stink of your, shall we say, poop.
For what wouldn’t be the first time, Tyler sent Reroofer up there with a can of black spray paint. I don’t have to remind you that details matter, and who wants a white pipe sticking out of the roof when one could have a black pipe. Not Tyler, the Virgo, who had already spray-painted the exterior vents for the dryer and stove white to match the siding.
Reroofer’s work was impeccable; when he was done, the roof looked as good as new.
An HVAC guy, complying with Tyler’s wishes.
A week or so later, the HVAC guys threaded a flue vent liner through the chimney in preparation for the fireplace we were installing in the sanctuary-cum-great room. Before ascending the ladder to straddle the highest peak on the roof, Tyler handed the appointed HVAC guy a can of heat-resistant black spray paint with explicit directions to paint the vent at the top of the chimney.
“What did the HVAC guy say?” I asked later.
Tyler said, “I think he was surprised I had heat-proof black spray paint on hand.”
# # #
Tomorrow: Chapter 22 opens, and the air is electric. Read it here.
Our story so far: Things were looking up in the old Methodist church we were turning into our home when my husband Tyler finished constructing the floor of the balcony in the great room.
# # #
Now we could not just imagine but actually see all the square footage we had added with this balcony. It was magnificent even in its inchoate state. We had essentially added a second living room; one would be able to watch the big-screen TV on the main floor from the balcony. Tyler described the dream recliner he wanted to situate there in all its roomy, reclining leather glory.
A view of the in-progress balcony from the north end.
But the drawback of all that square footage was all that square footage. We had planned to save a lot of money on flooring by restoring the Douglas fir, oak and pine floors throughout the rest of the main floor and second story. But there was no restoring the plywood flooring on the balcony.
A trip to a flooring store yielded one word when the salesman announced the price per square foot of the carpeting we liked: “Ouch.”
OK, well we could put off that decision (and expense) for a while. Clearly, we would have to shop around. One of the Big Box retailers was summoned to measure and provide a quote, maybe install the ethereal loop-pile carpeting in a creamy white with light gray lattice pattern we saw displayed on an endcap. It was called “Snowflake.” I was reminded of humorist Erma Bombeck who once quipped, “All of us have moments in our lives that test our courage. Taking children into a house with white carpet is one of them.”
From left, Hammerhead, Snowflake and Moon Dust. Which would you choose?
“Do we dare install white carpeting?” I asked, polling family members with chunks of Snowflake, Moon Dust and Hammerhead.
“The Hammerhead is safer,” my son-in-law said.
But everyone else voted for creamy white.
I didn’t know if we had the courage required to install such light-colored carpeting in the place. But on the other hand, weren’t we—a couple in their 50s with no children in the house looking to cover a floor far from muddy outside entrances—the perfect candidates for white carpeting?
Our story so far: The 20-foot ceiling in the sanctuary—our future great room—was the whole reason we were interested in the old Methodist church so we wanted it to look not just good but grand.
# # #
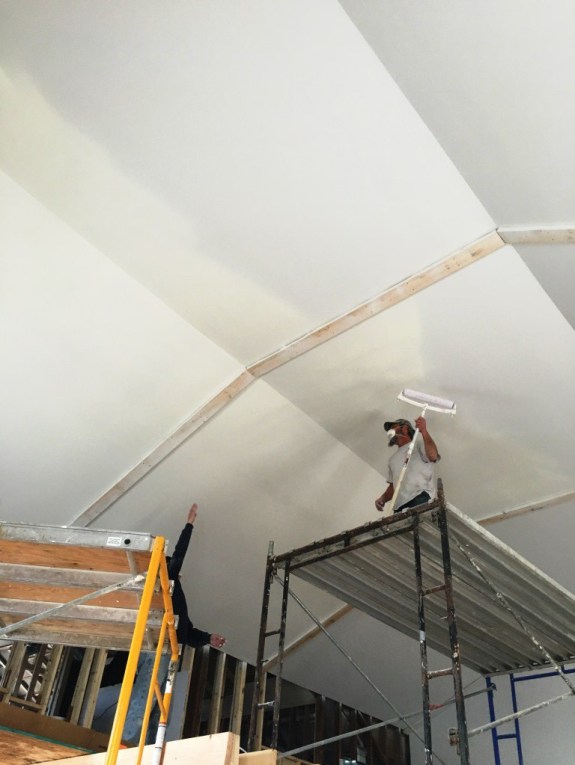
The drywallers at work, painting.
As long as the scaffolding was in place (and before we built the balcony), Tyler enlisted the drywallers to paint the sanctuary ceiling. As with the drywall, they were nothing if not efficient. They used a sprayer and an enormous roller to do the work. When I walked into the sanctuary to check their progress, it was like walking into fog; the process created an astonishing amount of airborne particulates. Hours later, a fine white dust covered everything in the room.
What color white? This was another detail that mattered. I didn’t want neon white—this was no hospital—so I chose Behr’s Sleek White in eggshell. It was that or Polar Bear, which had a grayish cast. I hoped I chose well.
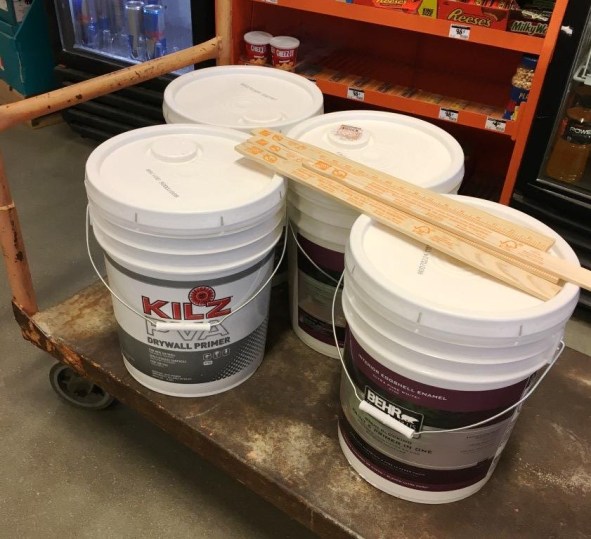
How much paint is required to paint a church ceiling? Now we knew. We purchased ten gallons of primer and ten gallons of white paint. I couldn’t even lift the buckets! Then, two days later, I picked up two more gallons of paint so the drywallers could finish the job. Twenty-two gallons. That’s a lot of paint.
It’s a workout pushing 20 gallons of paint through a Big Box store.
# # #
Tomorrow: Building a balcony begins with two steps. Read about it here.
Our story so far: My husband Tyler and I purchased a 126-year-old Methodist church to turn into our home. Three months in, we had completed demolition and were deep into the framing and mechanicals phase of the project.
# # #
Chapter 21
Our Number One design rule was “details matter,” and this was most important starting at the top: The ceilings. The high ceiling in the sanctuary—our future great room—was the whole reason we were interested in a church so we wanted it to look not just good but grand. This is where the finishing work began.
As soon as they had completed demo on the sanctuary ceiling, the drywallers got to work installing the product from which they derived their name: Drywall.
Drywall, for the uninitiated, is a panel made of gypsum plaster pressed between thick sheets of paper. In modern homes, drywall is rarely seen but it literally surrounds us, concealed with paint or wallpaper or paneling inside our walls and ceilings. In the 1950s, it began replacing the traditional lath and plaster as a speedier alternative. We’d removed a good deal of plaster lath from the church to expose areas where we required ducts, pipes and wiring, but on the whole we left it intact where we could because it was strong and secure. But this wasn’t the Sistine Chapel, and we weren’t creating frescos in the plaster. Our sanctuary ceiling required new drywall to replace the fiberboard tiles that were there when we bought the church.
The sanctuary ceiling, post demo. You can see the fiberboard tiles on two-thirds of it. We just covered them up with drywall.
Drywall comes in 4-by-8-foot sheets, and the drywallers chose to get it into the church with a boom truck through the upstairs windows. One might think an eighth-inch doesn’t make any difference in most matters, but not Tyler. He chose 5/8-inch drywall for the sanctuary ceiling because it was stiffer and laid flatter. It was also heavier. At one point, Tyler’s hired man St. Johnny and I moved a few pieces out of the way, and it was like, well, like hitting a brick wall.
But the unwieldiness of these large sheets of drywall didn’t deter the drywall team, even as they navigated scaffolding fifteen feet high and higher. Mudding the seams came next, and in a matter of a few days, they had performed their magic.
The great room ceiling, post drywall and mudding.
# # #
Tomorrow: How many gallons does it take to paint a church ceiling? Read about it here.
Our story so far: While juggling other projects, we worked on the bathrooms in the 126-year-old Methodist church we were turning into our home.
# # #
Meanwhile, Tyler ordered the fiberglass shower surround and corner tub for the upstairs bathroom from two different big-box retailers (each cost roughly $1,000, which goes to show how much less were cookie-cutter options than custom ones). We needed to have these before we constructed the walls because they both were too large to get through the doorway. Fortunately when they arrived by delivery truck, the odd assortment of contractors on site at the time helped get them upstairs.
We (by “we,” I mean mostly Tyler) built the walls for the bathroom on the second floor. Like our other bathrooms, this one featured a pocket door.
Besides the pockets provided in the form of a kit from Home Depot, these pocket doors required doors. For the second-floor bathroom and the powder room on the main floor, we were using the doors that had been on the basement bathroom and utility room. They were beautiful solid wood covered by layers of paint (and other gunk).
This door, formerly on the basement bathroom, would be reused as the powder room pocket door on the main floor.
Tyler tried using a non-caustic stripper, but he got nowhere with it.
So we endeavored to have them dipped. Dip stripping is when wood is placed in a large vat of solvent to help remove paint and varnish before refinishing. A nearby antiques dealer hooked us up with her dipper.
The doors were free because they came with the church. But dipping them cost $200 each.
Oof. You know that sound Skipper makes when Gilligan accidentally hits him in the gut? Yeah, that.
Doors, post dip.
But in any case, they turned out beautifully. All they would require is a bit of light stain and some polyurethane. And a couple of cool plates to cover the door knob holes.
Our story so far: After much backing and forthing, we found a reasonably affordable way to construct an extra-large custom shower in our master bathroom in our church conversion, but we couldn’t put away our shopping list yet.
# # #
Ah, the fixtures.
I wanted a rainfall shower head. I naively believed that’s how they were sold: Shower head, rainfall; Quantity: One.
Um, no.
One needs valves. They’re the parts you can’t see, but if you don’t have them, you don’t have things like water pressure or temperature control. Then you need something called “valve trim.” This the knob that turns on the water.
Then you need the shower head. But sometimes you might also need a shower head arm and a shower head flange.
Naturally, each of these parts has its own price.
Oh, and you’re not done yet. Now you choose a style. And don’t forget the finish: brass, copper, bronze, chrome—oh, not so fast—would you like that in polished, brushed, matte?
Mm, pretty.
Tyler chose a distinctive Kohler bathtub faucet for the upstairs bath but we went with the “contractor special” for the shower up there. For the master bathroom, we also considered Kohler, a manufacturer based in what was now our home state of Wisconsin, but in the end we went with polished chrome Moen fixtures. I was reading everywhere that brass was new and trendy, but I hated brass; polished chrome would look clean, be durable and would make it easy to find accessories and other fixtures.
# # #
Tomorrow: Why brass is crass. And other judgy opinions from the peanut gallery. Read it here.
Our story so far: A chance encounter led me to a tiler who was willing to take on our extra-large master bathroom shower in the old Methodist church we were turning into our home.
# # #
After a little back and forth over the course of a week or two, we agreed to provide all the materials per You-Can-Call-Me-Al’s specs, and he would perform the work to be paid by the hour.
This meant we would have to buy a custom glass door and have it installed. Which meant visiting with another contractor. One lead led to another, but after I defined my wishes with a glass expert, he sent me a quote. Besides the door, another half wall was included which was more affordable than two glass walls but still lux.
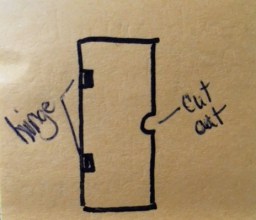
Top-notch graphics.
In the middle of these negotiations, we saw a “Fixer Upper” episode in which the shower door had a cut-out in the glass instead of the handle. Very trendy. I inquired about this, and by gum, the glass expert could do such a thing. For a price, of course.
In the end, we’d have nearly exactly the master shower we’d envisioned: Extra-large and airy.
The only do-it-yourself part would be the shopping.
You-Can-Call-Me-Al suggested buying tile at a Big Box store because if he ran short, it would be easy to get more. If, on the other hand, we found something special-order from Spain, well, then we might have problems.
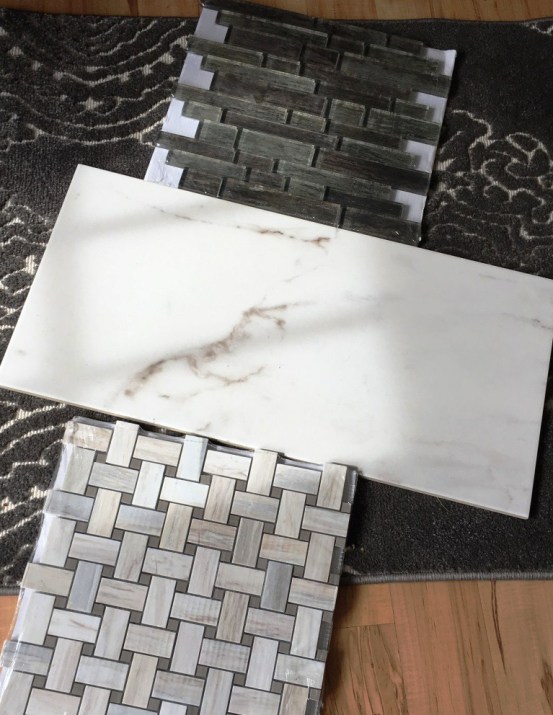
So I went to Home Depot (again) and made like Christina El Moussa from “Flip or Flop.” I juggled samples on the floor of the store and settled on three: One for the floor of the shower, one for the walls, and one as ribbon accent. I bought one of each and brought them home to the rental house to sell the salesman on them. He was no Tarek, but then he had no reason to gripe—let’s be honest, I choose options available at a Big Box store—Tyler agreed to my vision.
This is definitely one project I can’t wait to see finished. From top: accent ribbon, wall tile, floor tile.
All told, our extra-large master shower would cost us about $7,000. Plus plumbing and fixtures.
# # #
Tomorrow: Ah, the fixtures. Like everything else in a home remodeling project, the choices can overwhelm. Read about it here.
Our story so far: We had established we weren’t willing to tile our own shower in the old church we were renovating into our home, but we were going to take a bath on the project if we accepted some of the stratospheric contractors’ quotes we received.
# # #
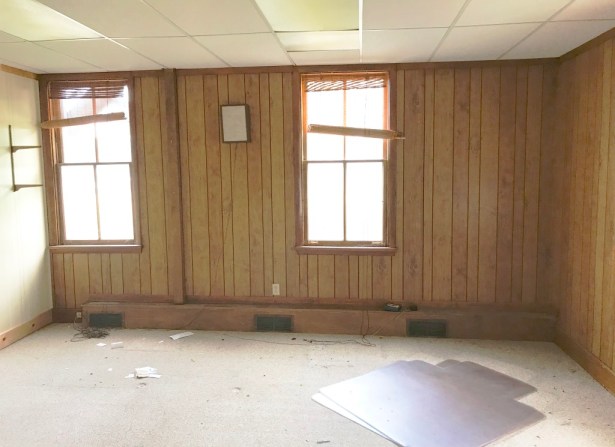
This is the room in the church–prior to demolition–where we planned to put our master bathroom. The corner on the right is where the shower was planned.
Then I experienced another one of those moments of serendipity that had been blessing us throughout this project.
I went to the post office to ask about whether we were the getting a mail box or post office box. I had already been there four times and had left without a clear answer.
As I was about to step into line, the man who held open the door for me motioned to let me in line before him.
“No, go ahead,” I said.
But he was a gentleman of the generation when etiquette demanded ladies first (let’s be honest, he looked to be my age). I accepted his offer.
I explained my problem to the man behind the counter, beginning with this description that had become familiar to my lips: “I bought the old Methodist church, and we’re turning it into our home.” Etc, etc.
During a pause in our conversation, the gentleman behind me asked, “You’re remodeling a church?”
“Yup, we are.” I smiled.
“Do you need any help?” he asked.
“Yes! You know anyone?”
“Yeah, me,” he said. “I’m a master carpenter. And I do other things.”
“Do you know any tilers?”
“Yes, I do tiling.”
“Do you have a card?”
He fished a card out of his pocket. By now I was ignoring the postal employee. I read the card, and an old Paul Simon song floated into my head.
“Al? Can I call you Al? Do you have time now? My husband is at the church. He handles all the contractors. You could go talk to him now.”
“Sure,” You-Can-Call-Me-Al said. “Where’s the church?”
And the polite gentleman went to the church, introduced himself to Tyler—You-Can-Call-Me-Al—and told him, yes, he could tile a shower for us, he did it all the time.
Meanwhile, I nailed down an answer on about our mail: We would be getting a box at the post office, not a mailbox.
This is the master shower area studded in.
# # #
Tomorrow: We piece things together. Read about it here.
Our story so far: In the midst of the framing and mechanicals phase of renovating the 126-year-old church into our home, we tackled showers. And it was like having a cold shower—a real wake-up call. The first quote was a doozy.
# # #
We would have to make some compromises. We started by eliminating custom showers on the second-floor and in the basement; we could go with fiberglass surrounds for those showers—only our guests would be using them anyway. We also relegated the basement shower to Phase Eight when we tackled that level; we needed to get the main floor habitable first.
So Tyler went back to the acrylic shower guy and got a quote on the master bathroom shower only: Still $8,728 plus plumbing and fixtures.
Uff-da.
We had two insurmountable hurdles for this shower. It was extra-large so we couldn’t go with a standard insert. And we wanted to maintain an openness in the bathroom that demanded two glass walls. “Extra large” and especially “extra large glass” were pricey.
OK, let’s get another quote, this time for tile. We approached a well-known area remodeler who sent a knowledgeable and efficient estimator to the church. He asked informed questions, performed detailed measurements amidst our dusty church and returned a professional, detailed quote: $12,500. Plus fixtures and plumbing.
Oh, boy.
Well, unless we left out a toilet and sinks, such a beautiful shower was still more than we budgeted for a master bath in the Tequila Budget.
This was a problem.
While shopping for cabinets elsewhere in the church, Tyler spied a do-it-yourself shower option that wouldn’t require us to tile. The material for the shower walls came in full sheets that could be cut to size.
Price for this do-it-yourself option? $7,414 plus plumbing and fixtures.
Well, we were getting warmer, I guess.
# # #
Tomorrow: Serendipity in the form of a gentleman pays us a visit. Read about it here.