How a minimalist color scheme can be cozy

Normally, when I think of minimalism, I think of angular lines and chrome, which is probably neither a complete nor fair definition. Cozy would not have been the first adjective I would use.

Yet, when the world turns topsy-turvy as it has in the past year, people begin to think differently about what makes a cozy home. In COVID-19 polluted world, the idea of living in a space that’s free of excess—one that fosters a sense of calm—has become more appealing to homeowners.

One of the hallmarks of minimalist home design is a monochromic color scheme, and even though I’m not a fan of minimalism (at least in home design), I can wholeheartedly endorse a monochromatic color scheme.

It’s one way to reduce visual clutter, Kelle Dame of Kelle Dame Interiors in Kenosha told the Milwaukee Journal-Sentinel recently. Lowering the color contrast can result in a clean look as opposed to contrast which creates energy, tension and stimulation.

I’ve chosen paint colors for two homes in the past three years and went with monochromatic colors in both, and I can attest to the calming nature of a clean look.

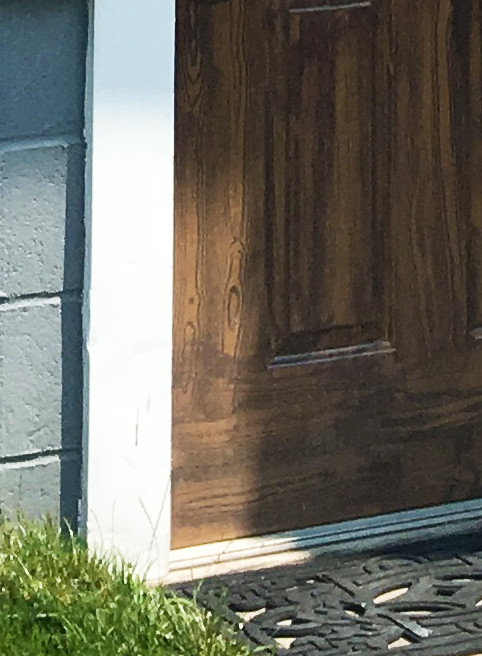
In every other house I’d owned, I (or my husband) painted every room a different color mostly because that’s what everyone does, especially in cardboard box-type houses when paint color was usually the most distinctive design feature of the room. But in the chome, I had all kinds of other distinctive features vying for attention—etched windows, high ceilings, a dramatic spiral stairway and original wood floors. I decided I didn’t need a bunch of different paint colors muddying up the canvas. I had every room painted in the same colors to create a cohesive backdrop to everything else going on.

  • For the walls, I chose a light gray inspired by Behr’s Evening White but mixed by Sherwin-Williams. It makes me happy just walking through the rooms any time of day.
  • The trim, a white inspired by Behr’s Bleached Linen, pops against the gray.
  • And the wainscoting, a tan inspired by Behr’s Arid Landscape, brings warmth to the scene (and also is reminiscent of the color it was originally painted).
  • Most of the ceilings in the church are painted in Behr’s Sleek White in eggshell.

More recently, we repainted our condo in Texas.

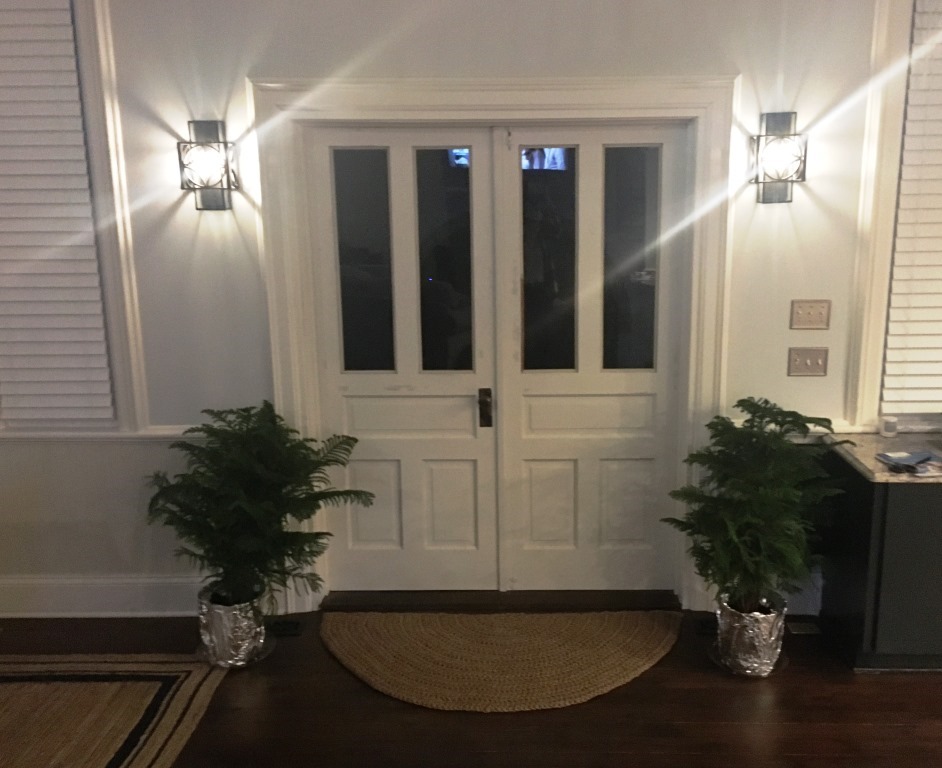
After painting the entire church in one color scheme, I knew I would do that again in this condo. I decided to switch the dark and light of the original condo paint job by painting the thick, beautiful trim a darker color than the walls. This had the added benefit of saving money on the paint job because we had the ceilings painted the same light color as the walls.

  • I adore the is-it-gray?-is-it-green? vibe of the trim color, called Sensible Hue from Sherwin-Williams Nurturer collection. It calls attention to the most interesting architectural elements of the room—the doors and windows. And the windows become beautiful frames for the view of the lake.
  • A darker color on the wainscoting is Illusive Green.
  • The walls and ceilings were painted in Oyster White.

As a lake home, the condo needed a calm and watery theme (rather than Spanish Revival or whatever was going on before). These paint colors coordinate with the blues and greens of the furniture and accessories we invested in.

How to amp up the coziness value? When monochromatic colors are used, such as whites, creams and other neutral colors, texture will boost coziness, that Kenosha designer Kelle Dame says.

I did that in both homes with jute rugs, baskets, fuzzy throws and textured pillows.

At the church, I mix textures of natural wood, jute rugs, glass and metals.
At the condo, I recently invested in all new bedding, including throw pillows that sport shiny, furry and sequined textures.

An added benefit of going monochromatic throughout an entire home is that it eliminates constant decision making. Once you decide on a scheme, every room is the same. Easy-peasy. And a homeowner needs to save only a few cans of paint in the basement or utility closet for touch-ups.

There’s not a day that goes by that I don’t admire the paint job in our home. Someday, I expect I’ll go in a completely different direction, but for right now, monochromatic gives me peace and comfort.

Nothing is more beautiful than the loveliness of the wood

Here is a great spring spruce-up project, and I’m sure you’ll be shocked to hear it involves paint, my favorite transformer.

I claim no credit for this before-and-after. Tyler’s idea, Tyler’s execution. Bravo, Tyler!

side door before
BEFORE

This is how our side door looked when we purchased the church. Once inside, you could enter the main floor or go down the steps to the basement. The food pantry had been operating in the basement, so this was the most commonly used entrance to the church then. When we acquired the church, the food pantry had moved across town, and nature was reclaiming the scenery as evidenced in this picture.

During reconstruction, we eliminated the entry to the main floor, but the door remained to provide access to the basement. The door was in good shape and functional, having been installed sometime in the ’70s or ’80s, I’m guessing, but it looked a little too commercial for our tastes, especially since it was on the same side of the house as the magnificent castle doors that replaced the ugly red ones at the main entrance.

So Tyler repainted the side door. With wood grain!

Using a wood grain tool he acquired in his favorite method (that is, the internet) and two colors of paint (lighter and darker), he made the door look like it’s made of wood instead of fiberglass.

side door wood grain
Here’s a close-up of the wood grain.

Tyler’s tips: Remove the door (don’t paint in place), remove the door hardware, paint outdoors, and don’t do it in full-sunshine when it’s 90 degrees (that last tip, he learned by sweaty experience when he completed this project last summer). We already had one of the paint colors, so for less than $30, we got a new door.

side door after
AFTER

So much better. I hate that exterior light above the door. The electricity was unhooked (uncoupled? eliminated?) during construction, so the light doesn’t work. It’ll get rewired when we finish the basement at some point, and I’ll find a new fixture then.

So there you go, an effective afternoon project that updates a visible part of your house.

# # #

Today’s headline is a partial quote from George Washington Carver, early 20th century scientist. Allow me to respectfully share the full quote:

“Nothing is more beautiful than the loveliness of the woods before sunrise. At no other time have I so sharp an understanding of what God means to do with me as in these hours of dawn.”

~ George Washington Carver

Finishing floors is like sausage; it is better not to see them being made

Our story so far: We spent lots of time and money sanding the floors of the 126-year-old Methodist church we were turning into our home.

# # #

Now that we could see finally see the raw wood, it was time to fill some of the seams. On newer wood floors, polyurethane alone would do just fine, but as our floors aged, some of our seams had widened.

Tyler inspected literally every inch of flooring as we proceeded. Ever the Virgo perfectionist, he was a harsh task master. Near the end of the sanding phase, he directed me to remove all the dried water putty in the seams of the maple flooring in the master suite. Someone had used putty as some point to fill some of the wider seams, and it appeared white against all the wood. Still “wide” was less than an eighth of an inch. Leaning on my knees while seated on a rolling office chair, I used chisels and tiny screwdrivers to pry the plaster out of every last seam in those two rooms.

sawdust plus poly
Boil, boil, toil and trouble, sawdust mix and cauldron bubble.

Instead of using water putty, Tyler used a trick he’d learned on an earlier project: He mixed the last layer of sawdust (which was little bits of wood, not that horrible glue and varnish) with clear polyurethane and squeegeed the goop over the floors (maple sawdust mix on the maple floors, pine sawdust mix on the pine floors, and never the twain shall meet). Some of it had to be sanded off again, but the seams were therefore filled with a sawdust mixture that was essentially the same as the planks.

squeegee sawdust
Tyler with a squeegee, pushing sawdusty polyurethane over the bedroom floor.

For the very worst seam on the second floor, more than a quarter inch in width, Tyler stuffed twine before filling it with sawdusty polyurethane. It couldn’t be hidden so we went with the theory that it added character.

twine filled seam
It’s not pretty, but it’ll do.

# # #

Tomorrow: Choosing stain. See how it turns out here.